| Author | Topic |
|---|

Location:
sunny coast, qld
Registered:
October 2002
|
|
a340e upgrade
|
 Fri, 06 May 2005 23:49

|
 |
Found this on supraforums. Anyone tried it? I was quite interested 
These are my own little tricks to make a a340 last. If you are rebuilding it, or having it rebuilt, install kevlar clutches, they tend to do best. Also, you must have a larger cooler on your car! Heat kills 90% of these transmissions. The other trick is to lock the detent(kick down cable) in full open, and to shim two of the accumulators, which is the only true way of decreasing shift time. this well affect the 1-2 and 2-3 shifts. Here's a brief walk through of that process...
PLEASE READ THIS FOLLOWING PARAGRAPH UPDATE
After having one servere issue arise(we are working to correct it) I must strongly advise the following points.
1: It is best to do this mod with the transmission out of the car, the time saved by just pulling it will payoff on assembly
2: Get a new gasket, they are VERY sensitive to dust and such and can distort and bleed pressure
3: DO NOT OVER TOURQUE THE BOLTS. This is CRUICIAL you can warp the valve body or the transmission case when you do this. The spec is around INCH LBS, No airtools allowed for the valve body!
4: Do not mix your bolts up, they go in certain places.
The issue that has arrisen is a car shifting into reverse when it should go into overdrive, and it appears to be a pressure bleedoff issue, once we have that exact cause located, I will post it, and ways to avoid it.
Remove transmission(my preference)
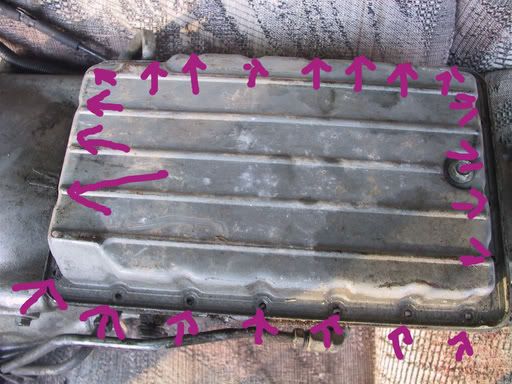
Remove the transmission pan bolts, I marked most of them, you can figure it out...
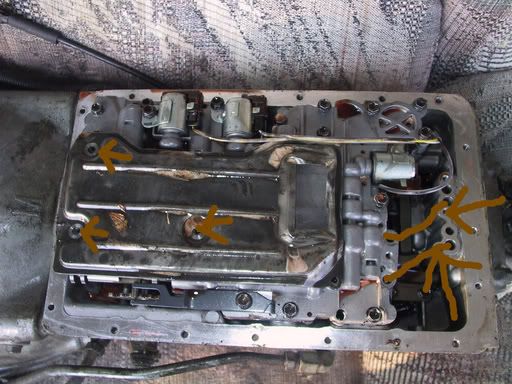
Remove the filter with the three marked bolts. Also there are two metal tubes, I already had them out so I drew them in, gently pry back and forth and they will come out
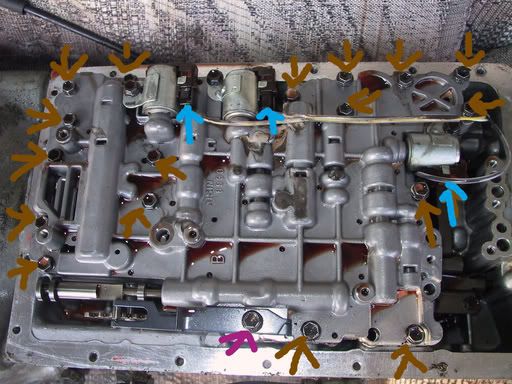
The fun part, my recommendation is do not take the bolts out of the valve body, they are specific on their location.
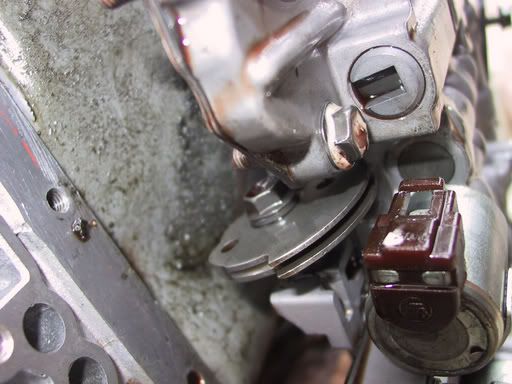
Completely loosen the brown arrows, loose till there is slack on the bracket for the purple arrow, and remove electrical connectors marked by blue. Before you can remove the valve body, you must disconnect the kick down cable, see next picture to see the bottom side of it
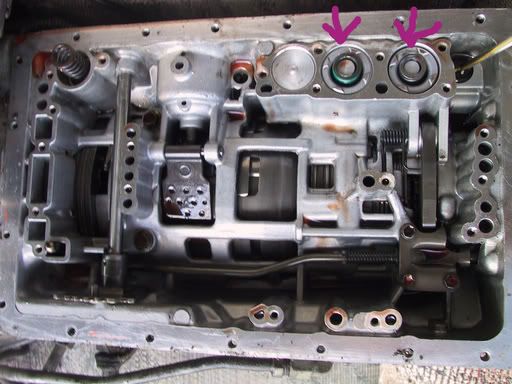
This is what everything looks like once you get the valve body off, The two "things" marked are accumulators, those two are the only ones we are concerned with at this time
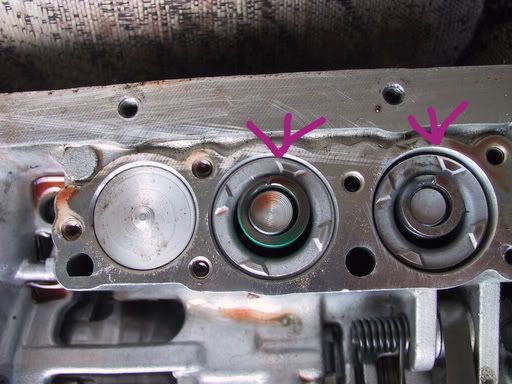
A close up of the accumulators
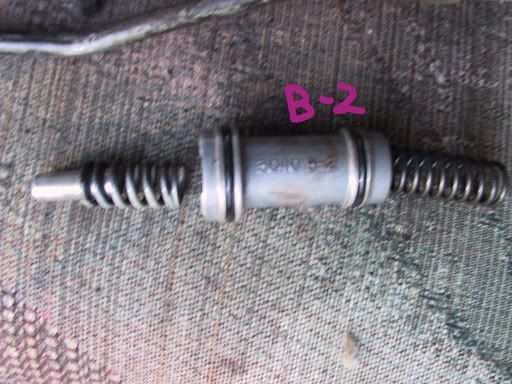
This is the first accumulator stretched out, the trick to getting them out is to push them all the way down and let them pop up... only way I can get them out.(this is the b-2 accumulator 1-2)
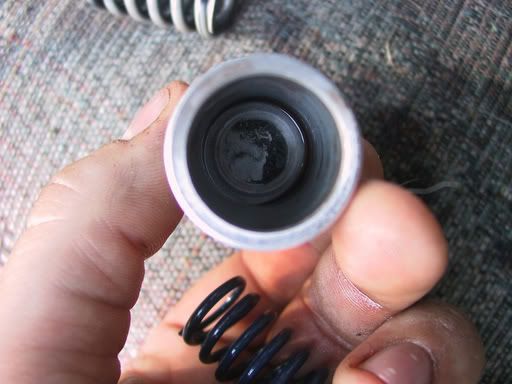
This is the bottom side of the accumulator(the one without the solid rod, that would be put in first going back in) This is where you want to place your shims, you want the shims to be about 1/3 of the spring travel, unless you don't care about you neck and you're tires breaking loose every shift.
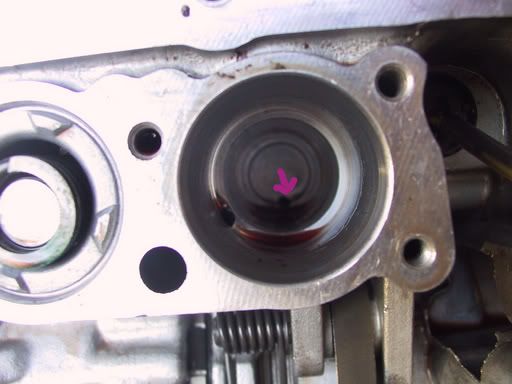
Make 100% sure that you do not block this port, if you do, you're screwed.
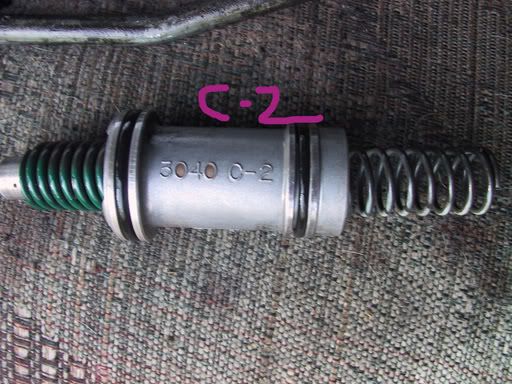
This is the c-2 accumulator 2-3 see above for details
[Updated on: Sun, 08 May 2005 01:17]
|
|
|