| Author | Topic |
|---|
Location:
sydney
Registered:
March 2004
|
|
|

Toymods Social Secretary
Location:
Sydney
Registered:
July 2002
|
|
|
Location:
Lost in the K hole
Registered:
May 2002
|
|
|

Location:
Tasmania
Registered:
April 2003
|
|
Re: Help - 4A-G Conversion
|
 Tue, 09 March 2004 01:04

|
 |
Hi,
This is pretty much all the things I could think of that needed to be done before and during the conversion.
Things like brakes, suspension and the like are dependent on your local RTA. You could have your suspension done whilst your exhaust is being done. Most exhaust shops also do suspension. You might as well have a go at the suspension whilst your car is apart in your driveway though. Just make sure you don't try and put the engine in, and do the suspension at the same time. One thing at a time.... You just don't want to get to overwhelmed.
1. Get your engine
Make sure it runs, has a warranty, etc.
2. Get a Sprinter T50. Oz spec ones have clutch fork on passenger side. Get a Jap one if you can. Get the bearing that goes in the gearbox. Cut the floor so the shifter will go
through.
Collect all of this, and get a 4AGE FWD flywheel, and the appropriate clutch for it. This will be either 200 or 212 mm depending on the flywheel you get. The bigger one is better. The clutch will depend on what you want. I choose an Exedy Extreme clutch with an upgraded pressure plate and higher temperature friction material. You might want a brass button version, it's up to you. Do this before you start the conversion. Speak to other Toymodders about the clutch, and there experiences with these.
3. I used Sprinter engine mounts, and the standard cross-member mounts
Get the Sprinter engine mounts before the conversion. I wouldn't pay more than $60 for them. One of the more "reputable" import yards here in Hobart wanted $200 for them. They are $212 new from Toyota.
4. The standard mounts will have to be cut of the cross member, and cut till they line up to the Sprinter engine mounts and the cross member. Engine was in and out 6 or seven times for this
This will obviously be performed when your car is off the road.
You will find that the Spinter engine mounts don't fit properly because of the supercharger.
This is how we did the engine mounts.
1. When you look at the intake side of the engine, you will notice a black brace that supports the inlet manifold, and also a large S/C brace with 5 or so nuts and the one long bolt holding it on.
2. When you put the Sprinter mount on, it will not fit.
3. We placed several nuts on the back S/C brace bolt, and used an angle grinder with a 5 inch METAL blade to cut this of the S/C brace. Take your time, and you will not touch the engine at all.
4. Once this is done, take the nuts of the bolt (Stops the bolt from being damaged), then use a chisel or screwdriver to break the back part of the brace away.
5. The next problem is the black brace. Place this in a vise, and place a bit of pipe over it and gently bend the pipe till it fits with the engine mount on. Use only small bends at a time, and it should fit like a charm.
5. I have a AW11 4AGZE, and they have the heater outlet pointing straight out of the back of the head. It's about 15cm long. We had it cut, with the outlet now facing straight up. This enabled us to sit the engine further back, but still with the ability to replace the hose at the back without removing the engine.
Get this along with radiator and the inter-cooler pipe mods done all at once at a radiator shop. You will have to borrow a car because your radiator will be out of the car....
6. The thermostat sits near the supercharger. I used the FWD thermostat.
Take some measurements of the hose lengths you need, and buy it before the conversion. It would help to get some 90 and 180 degree metal bend pipes to aid in hooking up all the water inlets/outlets. You could have the whole system almost pre-made before you put it into your car. Take it all off before you put the engine in though!
7. Radiator outlets are on the opposite side. Either have them switched over, or run some hoses across the front of the engine to the standard radiator outlets. I would get the hoses switched over, and get it rebuilt if you want a better set-up.
See point 5
8. Get the tailshaft shortened/lengthened
I'm measuring mine at the exhaust shop. I pick my car up tomorrow and they said it would be okay for my car to be put up onto the hoist to measure the tailshaft. This will be done after you have the engine in its final resting place.
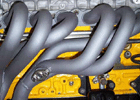
9. Get a nice big exhaust fitted. I collect my car from the exhaust shop on Saturday, with a nice 2.5" mandrel bent system with a muffler and resonator. Get your intercooler piping done now as well (If your going to run a front mount). I'm using a GT4 air-to-air intercooler front mounted.
Get this done after you have put the engine in.
10. Do your fuel system. I'm just running a VL external fuel pump. If I suffer fuel starvation, then I'll get some baffles put in the fuel tank.
Buy the pump and what ever lines etc you want before the conversion.
11. Wire the computer. I'm using the factory ECU.
This will be done after the engine is installed. If your going aftermarket, you should make sure that it has base maps for YOUR engine, and a loom. I'm having a go at mine, but will no doubt have to get an auto sparky to finish it.
12. Hook up a boost gauge if you want. I have used the clock as my gauge "holder". A little bit of file work and it fits nicely.
Save your money, and fit one after you have the car going. If you have the cash, than wire it up after the engine is put in.
13. Cry with frustration as the expenses keep mounting, and the money runs out.
Trust me, this will happen. Alternatively you could swear, punch a boxing bag, or get drunk (cheap wine, you are broke after all).
14. Replace all of the hoses and the timing belt.
Buy these before the conversion. Just buy the genuine Toyota parts. Get a filter and plugs, plug leads if you need them. And things like degreaser, engine oil, gearbox oil, strong hand cleaning "soap", chux, rags, Karcher to clean the engine bay, some rope (used it to line the g'box up with the new engine mounts), file, angle grinder, welding gear, tools, etc.
15. Put a Big pulley on . Replace the key whilst you're at it.
The key is a Toyota part that costs a couple of $(not many).
The pulley that I have is an Nevo 175mm pulley. You will also need a crank "puller". It helps you take the old crank pulley off.
Cheers,
Justin 
P.S. Use a Supra or Celica Steel case gearbox if you put in a 4AGZE. All you need is the g'box, g'box cross member and tailshaft of a RA23/28. That's what I have, but I haven't installed it yet. Also need an adaptor plate.
Can someone tech article this????????
|
|
|
| Current Time:
Sun May 5 22:59:02 UTC 2024 |
Total time taken to generate the page: 0.0049529075622559 seconds |